In Part 1, we have explored several tips to improve your unpaid search results, completely for free. However, free search results will only get you to a certain degree. If you are considering growing your business further, the paid Google Ads might be a place to start.
Part 2: Increasing traffic through paid Google Ads
Google Ads is a paid advertising service that lets any business reach out to millions of potential customers. When used correctly, it is a powerful marketing tool to attract new customers and grow your business, but it could also easily cost you thousands a month without generating any visible results. For a small business with a limited (marketing) budget, our suggestion is to approach with caution. If your business is at a reasonably stable stage but may be facing stalling growth, Google Ads might be a good channel to further grow your business.
Like most of my posts in this Digital Marketing for Group Activities Providers series, it is meant to serve as a starter's manual, rather than as a comprehensive guide.
Preparation phase
Before rushing to set up Google Ads, there are a few things you need to prepare and make sure you have a clear answer for each of them.
Your business’ overall marketing plan
Do you have any other marketing channels (for example, referral programme), and are you measuring their effectiveness (e.g., ROI - return on investment)?
This is important because Google Ads is only one part of your overall marketing plan, and measuring its effectiveness against other channels will tell you how useful it is and how much budget you should allocate to it.
Other marketing channels could include referral bonus, leaflet, print media advertising, and many others. Do you know how much each of the channels is costing you, and how much revenue does it bring back to your business? For more details on how to measure the effectiveness of your marketing channel, stay tuned for our upcoming posts.
Upfront “testing” budget for Google Ads
It takes time and money to build and improve a Google Ads campaign, how much are you willing or can you afford to put aside for Google Ads (almost treating it as a sunk cost that you may never recoup)?
Setting up and understanding the basics
In a nutshell, the way Google Ads works is that you “bid” for certain keywords, the algorithm will determine, among the many hundreds or thousands of bidders, which top ones to show to the user who searched these particular keywords. The bid price is one factor, but not the only factor in determining whether or not your ads will get shown. Other factors include quality of the website (speed to load, mobile-friendliness), past interaction quality (how long do previous users engage with your website - do they close it out immediately, or do they stay around and engage with the content), etc.
To get Google Ads running, you will need to sign up for an account, and most importantly, set up the free Google Analytics tracking tool (see the post on Google Analytics for more details). This helps you understand your audience demographic and behaviour, at which stage do they drop out of the sales conversion funnel, and what is the cost vs. benefit for your Google Ads campaigns.
Let’s walk through an example to understand some of the basic concepts.
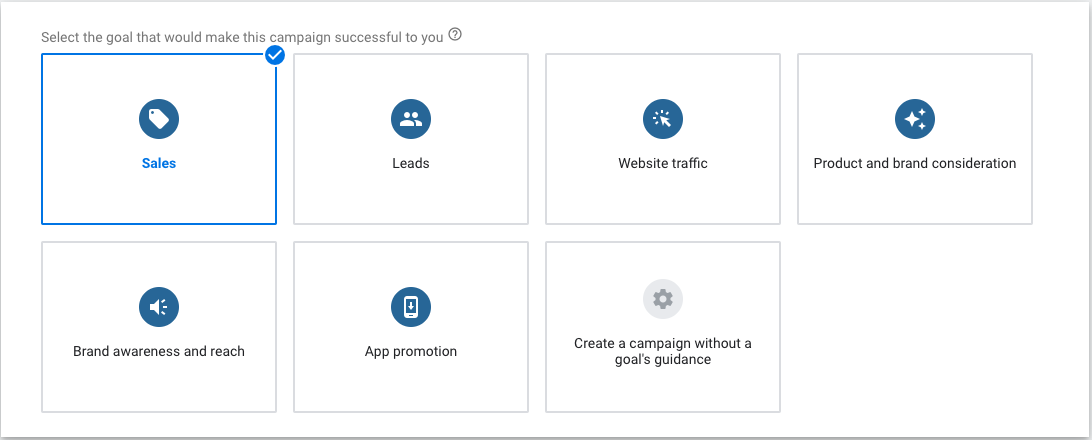
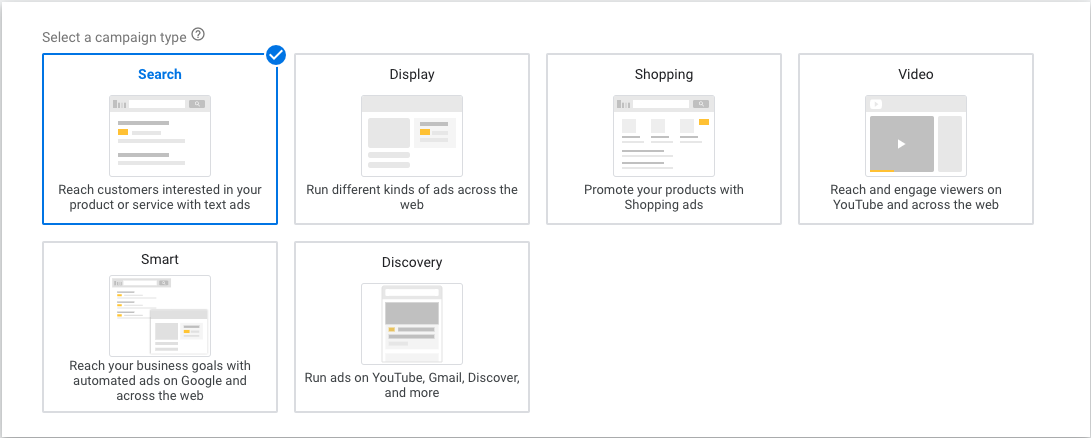
First of all, you will need to specify what is the goal and what type of campaign you would like to run. For starters, we would recommend choosing “Sales” and “Search Campaign”. Note that the “Shopping Campaign” can be extremely useful, but only if you are selling some physical goods - so chances are that the “Shopping Campaign” may not apply to your business providing group activities.
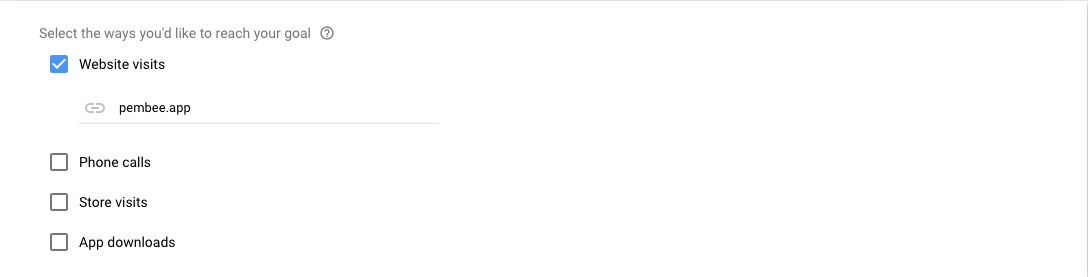
Then you will need to specify what is the end goal of your campaign, most likely a visit to your website. Note that you can specify the exact website address (i.e. specific activities) you want the campaign to direct to. We will talk more about it in the testing phase below.
The next page has more advanced settings, most of which are pretty self-explanatory. The important ones are setting a daily budget for this campaign, and bidding strategy.
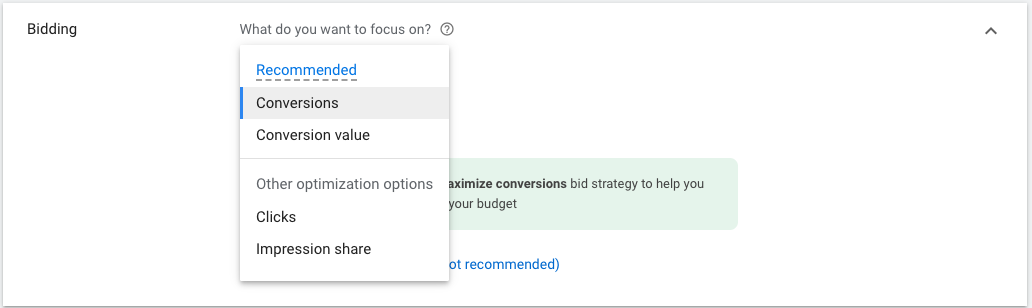
The bidding strategy directs the algorithm to focus on what matters the most.
There are essentially two groups of bidding strategies with two variations each.
The first group is focused on a “conversion event”, i.e. a purchase in most cases. You can either focus on the number of conversions or the value of the conversion. This group of bidding strategies requires a correct setup with Google Analytics and is recommended. Normally we would simply choose “Conversions”.
The second group is on the clicks itself, either number of clicks to your website, or the share of impression (how often do you appear in the search results). You may already realise that this group is less ideal because a click does not necessarily translate into a conversion, which is what most businesses care ultimately.
The next step is choosing the keywords, we will talk more about it in the testing phase.
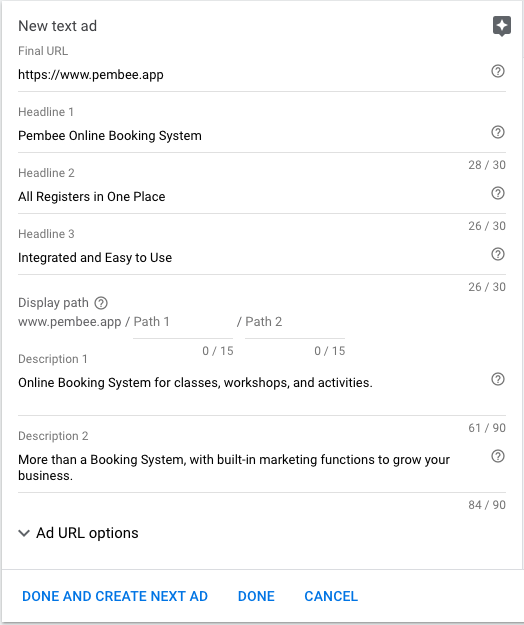
The final step is to create a few ads, by filling in headlines and descriptions. We suggest creating 2-3 ads with varying headlines and descriptions, as the Google Ads algorithm will “learn” and dynamically place the most suitable version depending on users’ profiles. If you struggle to come up with many variations of taglines, just try two, one with full sentences and another with phrases only.
When you click “Done”, the campaign will be created and the ads will start running shortly (usually in a few hours as Google needs to check that it is compliant with its terms and conditions and local laws).
Now let’s move on to the next phase to finetune your campaign.
Testing phase
Once you have decided to embark on the journey of Google Ads, it is important to set aside some time for this testing phase (depending on the nature of your business and frequency of customer engagement, it could range between a couple of weeks to several months).
There are a few key things you need to iron out in the testing phase: What products/ services to focus on, what keywords work best, what campaign parameters to optimise.
Selecting the Right Products/ Services
You may remember that at the first step of creating a campaign, you were asked to fill in a website url which will direct potential customers to this link. If you offer different classes/ activities, for example, a taster course vs. an 8-week course, a group lesson vs. a private lesson, you will need to think about which ones you’d like to focus on. This is obviously linking to what you are trying to achieve and the nature of your business. It may be that most of your loyal customers start from a one-day trial lesson, then naturally the trial lesson should be the product of focus.
Selecting the Right Keywords
You may remember the step about filling in keywords when creating a campaign. You can edit that once the campaign is created, by clicking on that campaign and going to “Keywords/ Search Keywords”.
You can add as many keywords you like for each campaign, by clicking the + button. To get inspiration, “Keyword Planner” in the “Tools & Settings” panel is a very helpful tool, which gives you the search volume for specific keywords, with suggested variations that maximises the potential audience size.
“Discover New Keywords” lets you explore different options of keywords and tells you the monthly search volume and bidding price range.
“Get Search Volume and Forecast” helps you test the likely result (number of visits to your website, estimated cost, etc.) after you have selected the preferred keywords.
After the ads have been running for a while, you will be able to see a “Search Terms” report, which summarises all the keywords that your ads have appeared under, and the performance for each (number of impressions, number of clicks, click-through rate, costs, etc.). This is an important part of the testing phase where you need to monitor carefully and adjust your keywords accordingly. This links nicely to another important concept - “Negative keywords”. These are the keywords that you do not want your ads to appear. For example, for a Yoga studio in Manchester, you may find that your ads appear under the keyword “Outdoor Yoga mats”. Clearly, you don’t want to spend money on searches like this!
Selecting the Right Parameters
Given the nature of your business, chances are that you are only focusing on a specific geographic region or demographic group. Therefore it is important to specify a few parameters so that the budget is focused on the most suitable audience.
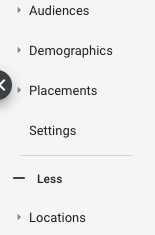
In the campaign settings panel, you will find a section for demographics (which lets you include or exclude people from certain age groups, gender, or household income) and locations (you can specify a city, region, or within a radius of a specific location). Do bear in mind that the more precise you specify these parameters, the fewer potential audiences you will get.
Another important angle to consider is that not all of your customers may be confined to a specific parameter. For example, holidaymakers could plan ahead in a different region, husbands could purchase gifts for their wives, etc. Therefore you may not want to completely exclude those audiences.
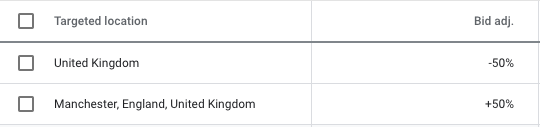
One way to solve this is to set different bidding adjustments, instead of excluding them. For example, if the majority of your customers are from Manchester, but you do get the odd bits of bookings from across the country, you can set bidding adjustments for Manchester and the broader UK. Similarly, this can also apply to different demographic groups and even keywords.
Monitoring Phase
The time it takes to complete the testing phase varies greatly, and often can be blurred with the monitoring phase. The key concept in this phase is really continuous monitoring and improvement of your bidding strategy.
For each campaign you have, there are a few key metrics that you need to monitor.
CTR (Click-through-rate): This is the % of people who have seen your ads that actually click on the ads. In a way, it measures the quality of your ads. If you have different ads, you will be able to see the performance difference and prioritise the most effective ones.
Search impression share/ Click share: This is another way of measuring the quality of your ads, by comparing it to your competitors. It shows your ads’ share in terms of total impressions and total clicks.
Conversions and cost per conversion: This measures how successful your campaign is, i.e. how many people actually purchase after seeing your ads. Note that this requires the conversion tag to be set up (see the preparation phase - bidding strategy)

There is not really a benchmark that can tell you whether your campaign result is good or bad, but generally, the click-through-rate is considered normal at around 0.5%-2%. For cost per conversion, you will want to make sure that the value it brings to you (in terms of sales) exceeds the cost.
Hope this post gives you a basic idea of how to start leveraging Google Ads to grow your business. We will post some more advanced tips to optimise your Google Ads results in future posts. Please leave a comment below with any questions or suggestions.